Well curiousity got the best of me and just had to see how the carrier ran on rc so I used the spare radio gear for an HL rc tank. I added my regiments marching song called I'm Ninety-Five. For the first test run it doesn't run too bad. Here's the video.
PS you will see one good reason for doing up the chin strap on your helmet.... LOL
http://s2.photobucket.com/albums/y18/pz ... arrier.flv
My Scratchbuilt MkII Carrier a WIP
Re: My Scratchbuilt MkII Carrier a WIP
Update:
I decided to remove the 5-spoked road wheels and idlers and replace them with the 6-spoked wheels. I have sealed, sanded, and primed the front top glacis and temporarily added the upper shield. I opened up the openings in the divider between the drivers compatment and the rear compartment. I also added more tension to the rear suspension so it sits level now... and the work continues. Here are the latest pics
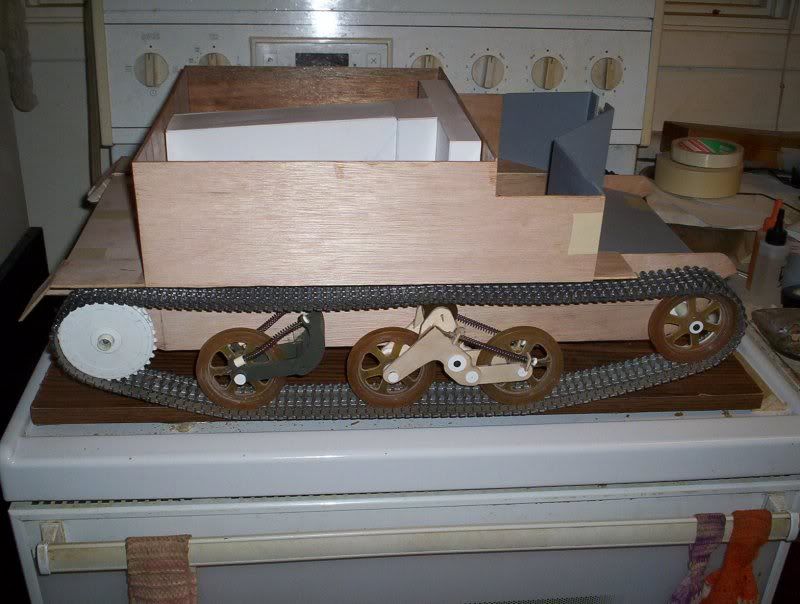
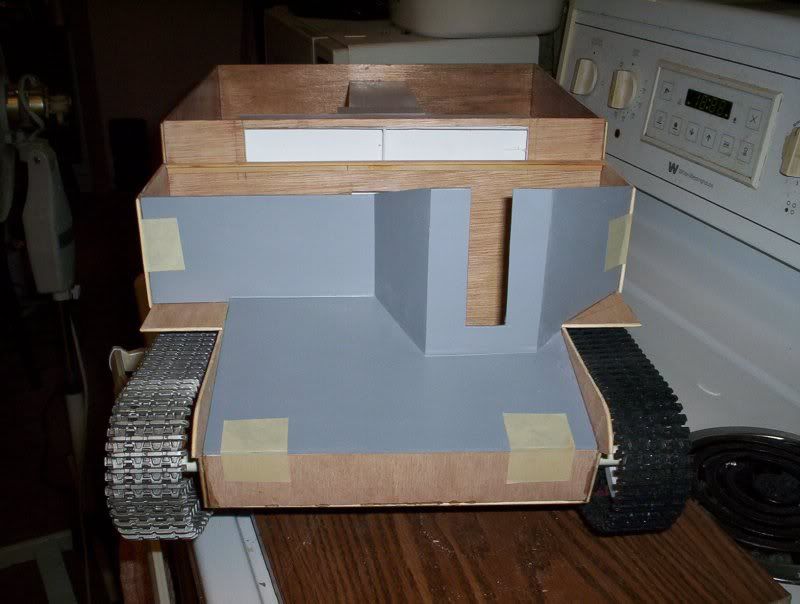
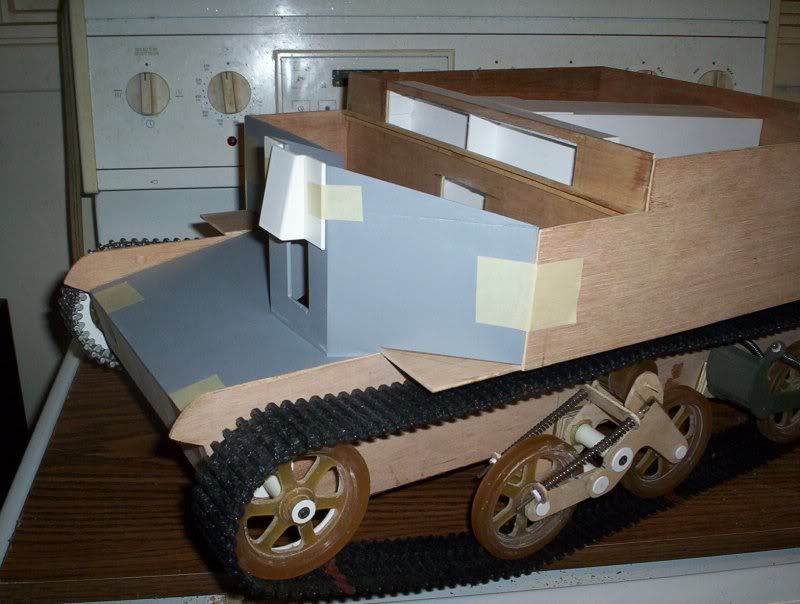
I decided to remove the 5-spoked road wheels and idlers and replace them with the 6-spoked wheels. I have sealed, sanded, and primed the front top glacis and temporarily added the upper shield. I opened up the openings in the divider between the drivers compatment and the rear compartment. I also added more tension to the rear suspension so it sits level now... and the work continues. Here are the latest pics


Re: My Scratchbuilt MkII Carrier a WIP
Absolutely awesome!
"He was a fighter in every way, he lived and breathed action"

-
Chorlitz|12.SS|
- Posts: 661
- Joined: Tue May 05, 2009 6:28 pm
Re: My Scratchbuilt MkII Carrier a WIP
Keep us updated.
Re: My Scratchbuilt MkII Carrier a WIP
Update... lots of pics:
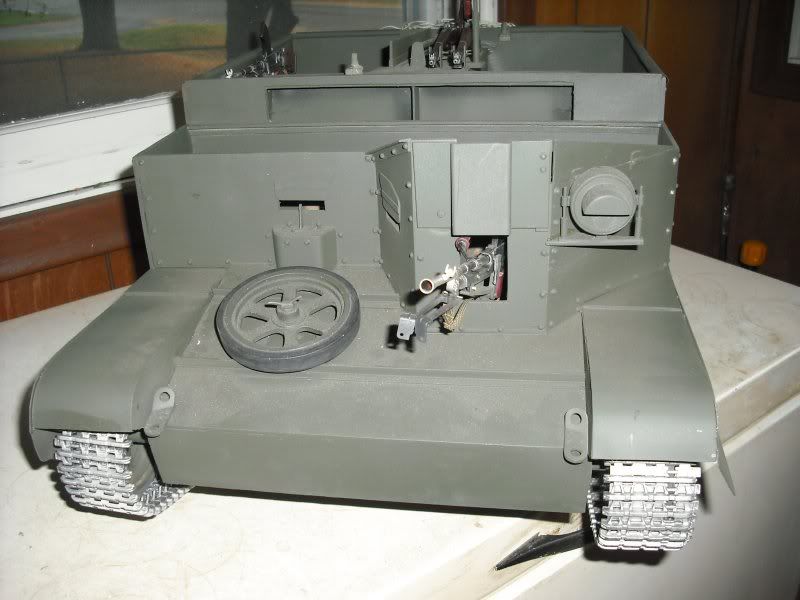
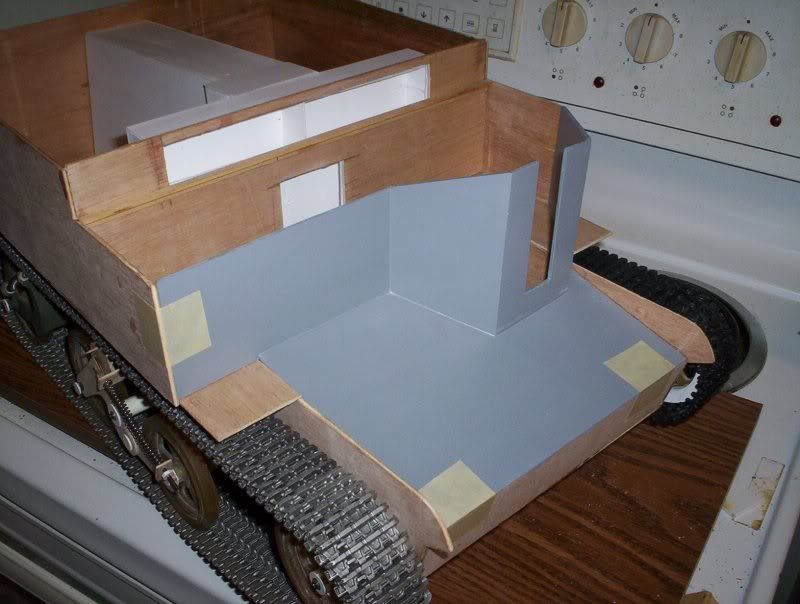
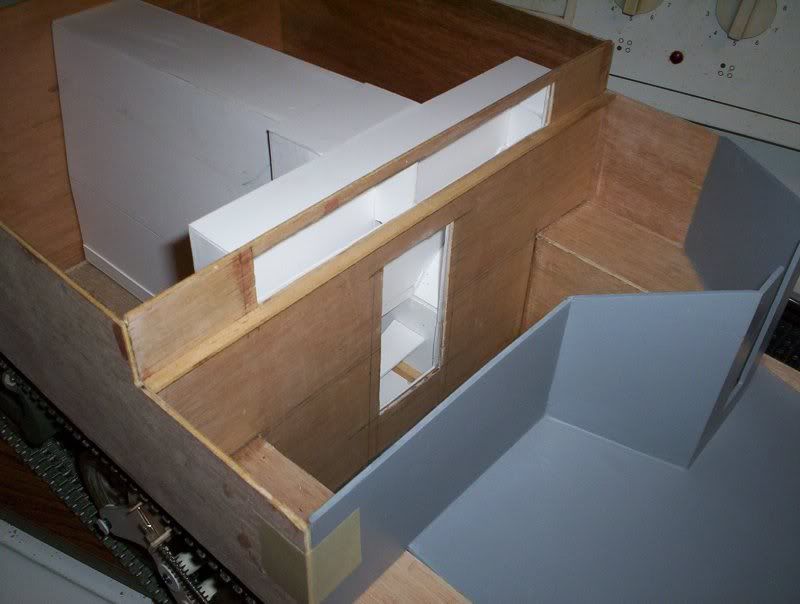
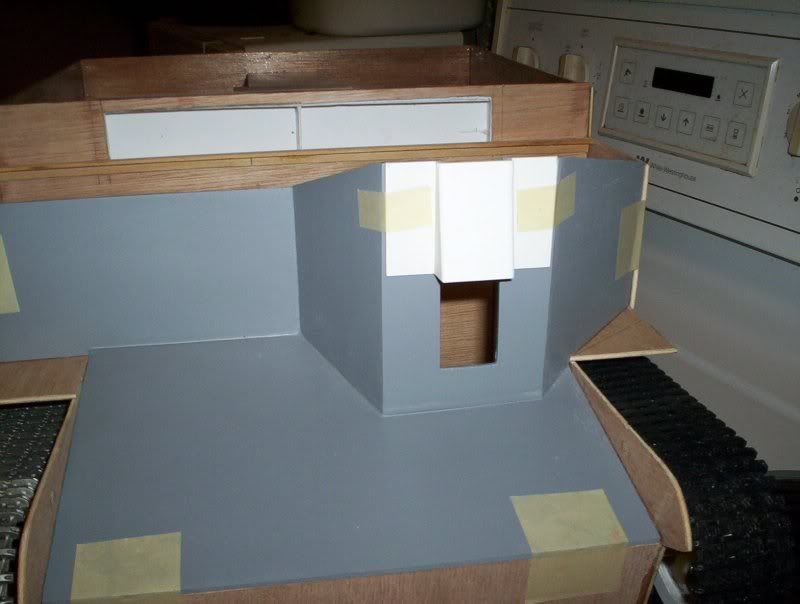
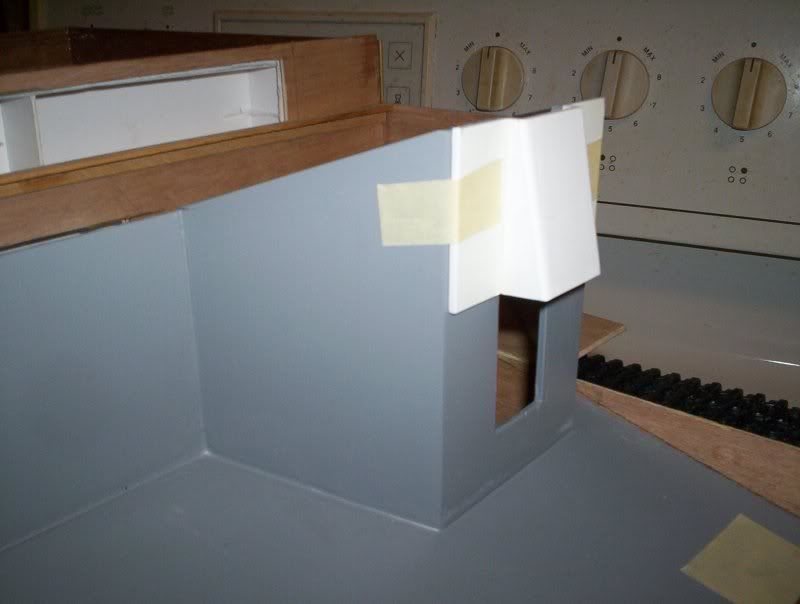
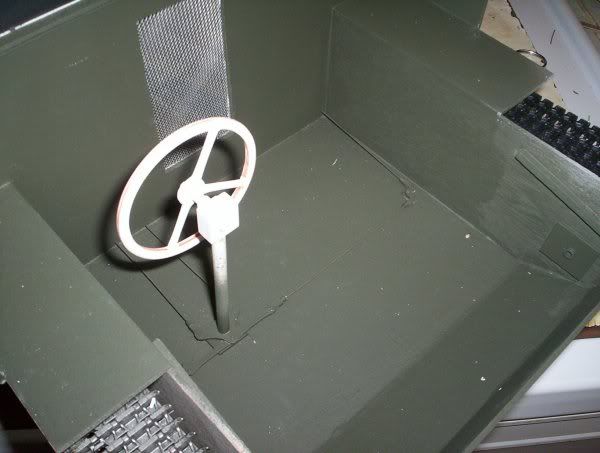
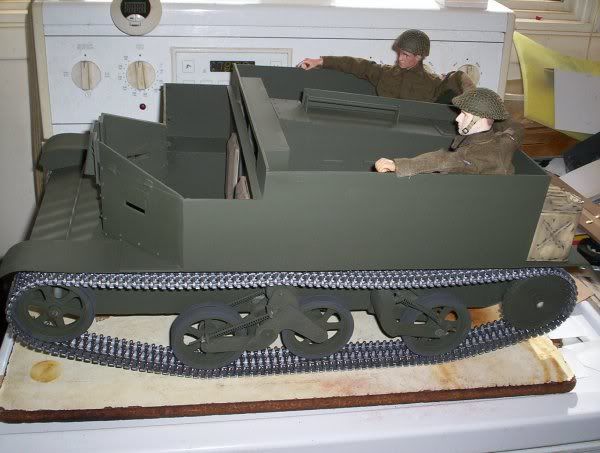
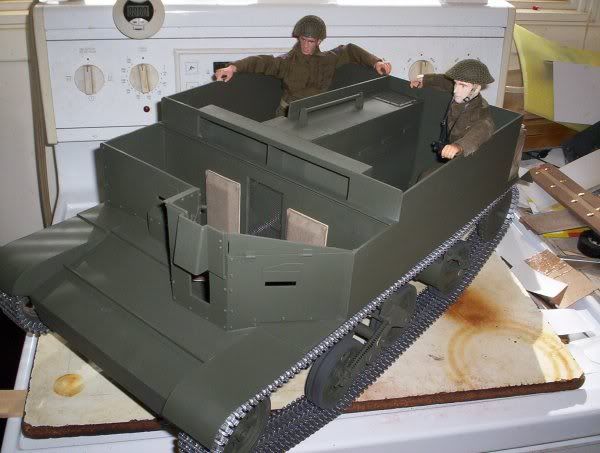
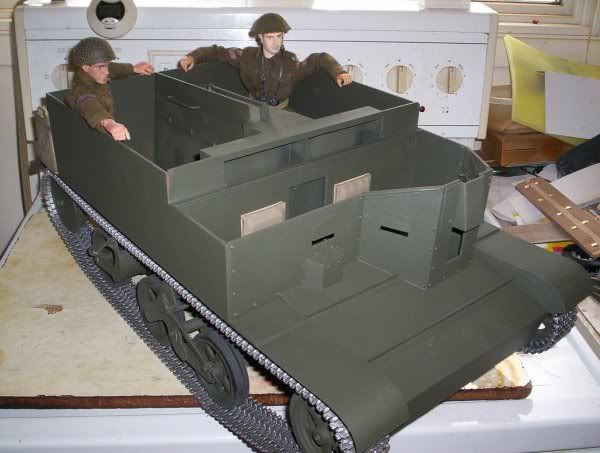
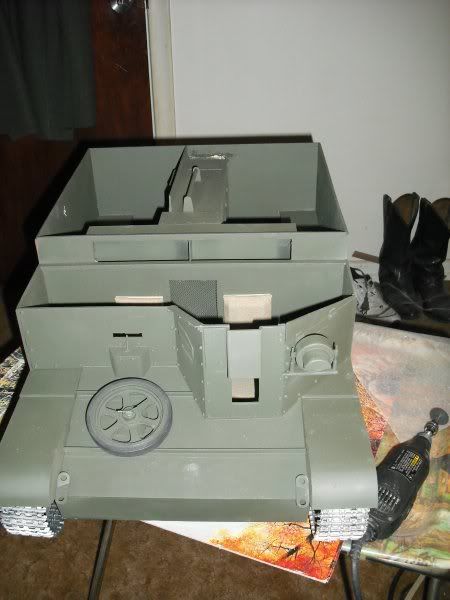
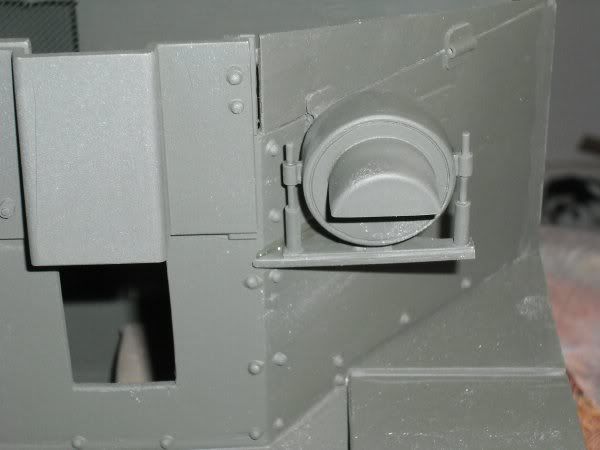
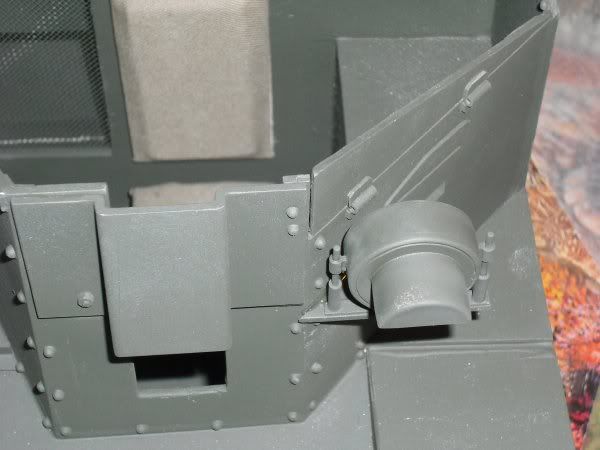
Well work is progressing on the carrier. I have opened up the upper vent and the radiator openings in the bulkhead. I used a piece of aluminum screening as a mock rad grill. I have added vision ports and guards with actuateing levers, constructed the steering wheel and mast, temporarily attached the seats, added dummy hinges to the ports side upper shield, made the front upper shield moveable, started the instrument cluster compartment. Here are pics of the work so far... there are lots of them
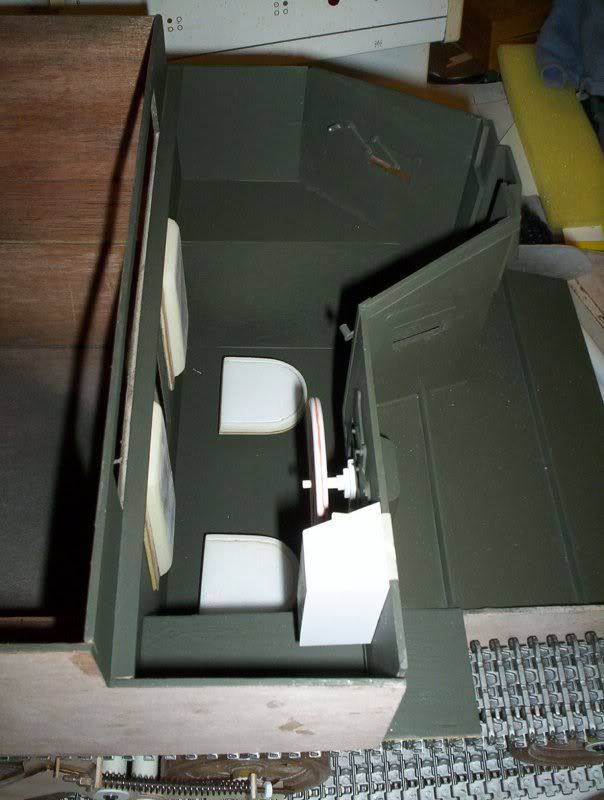
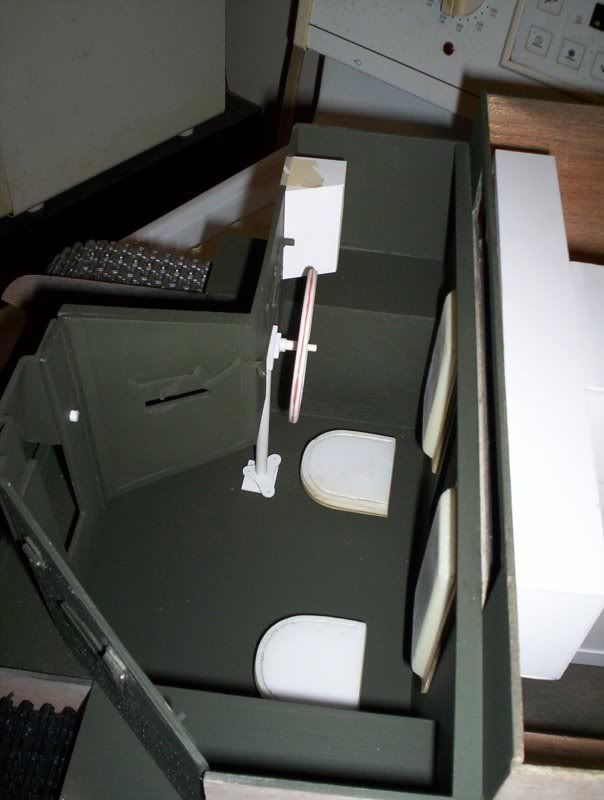
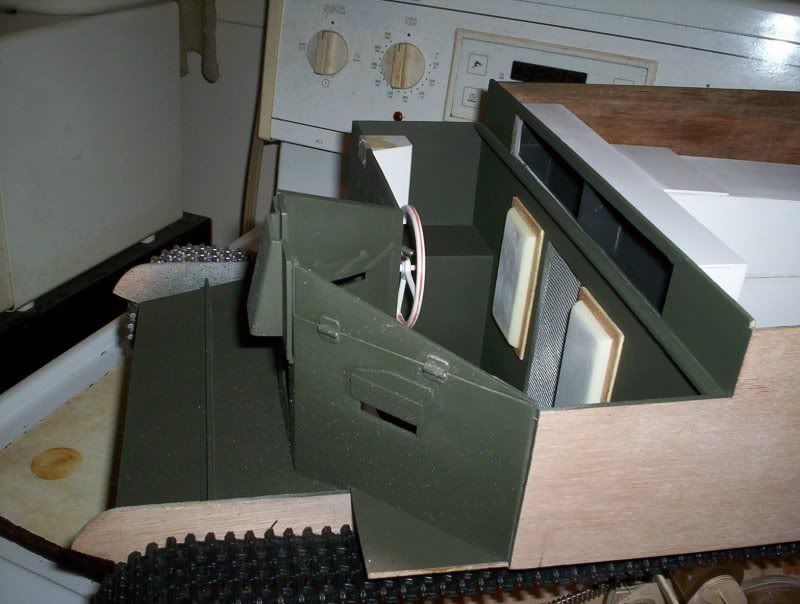
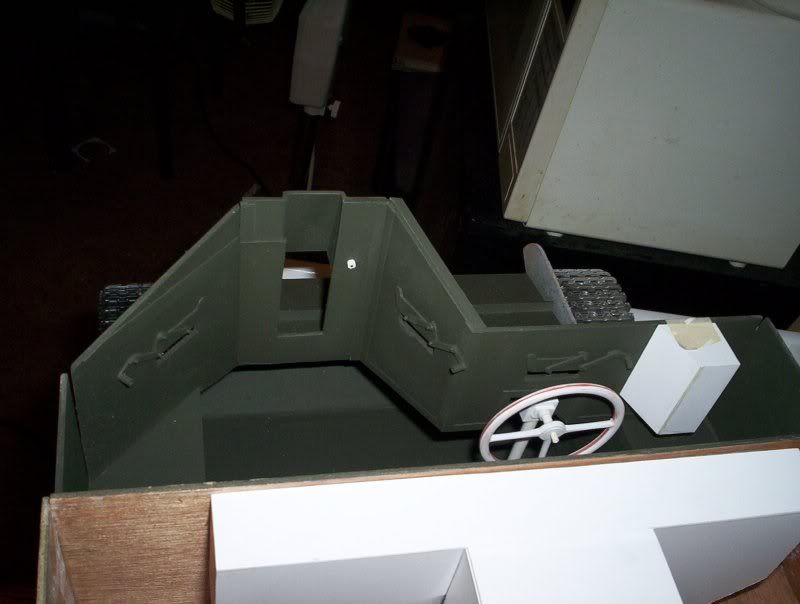
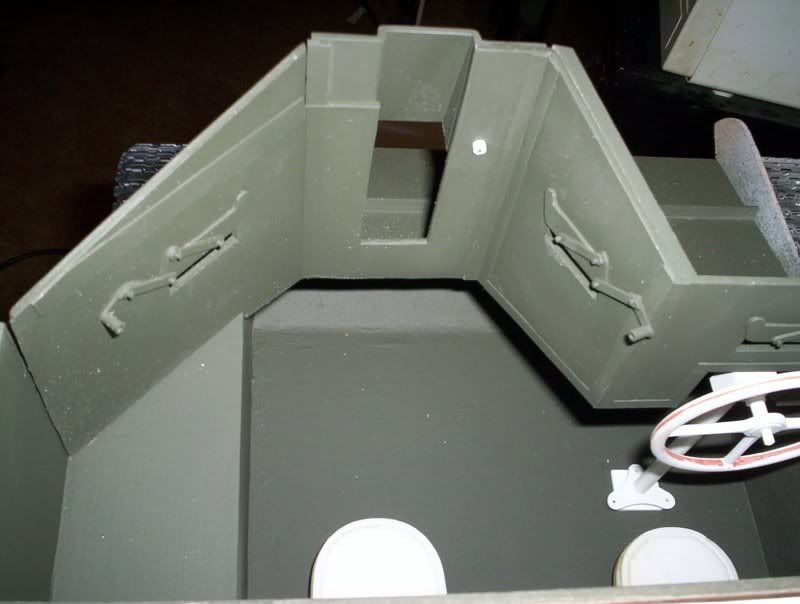
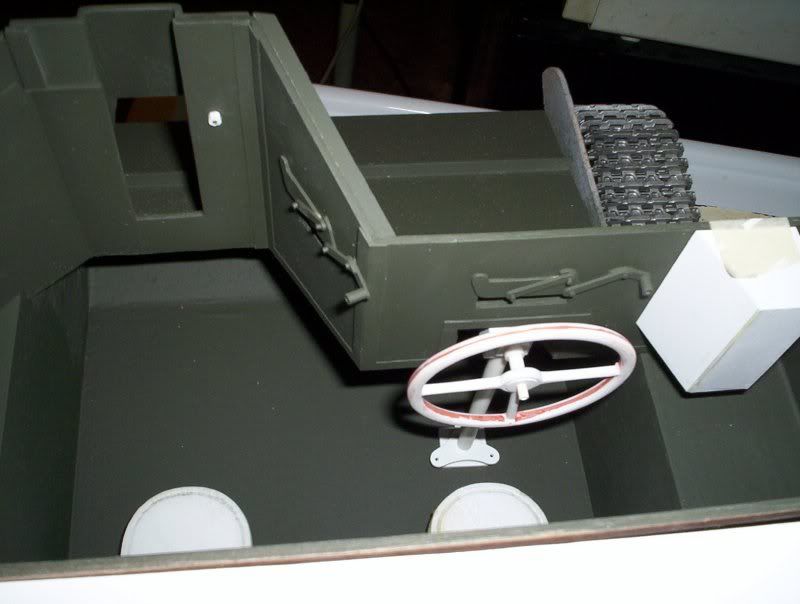
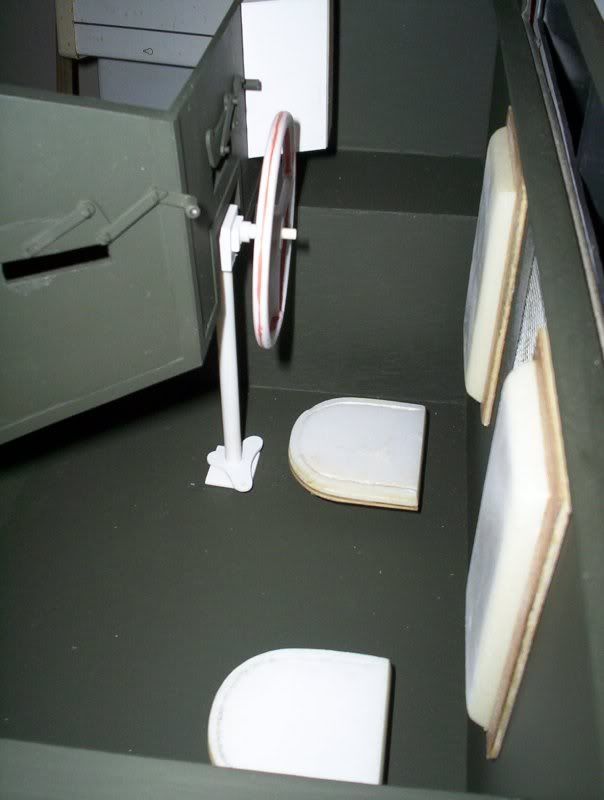
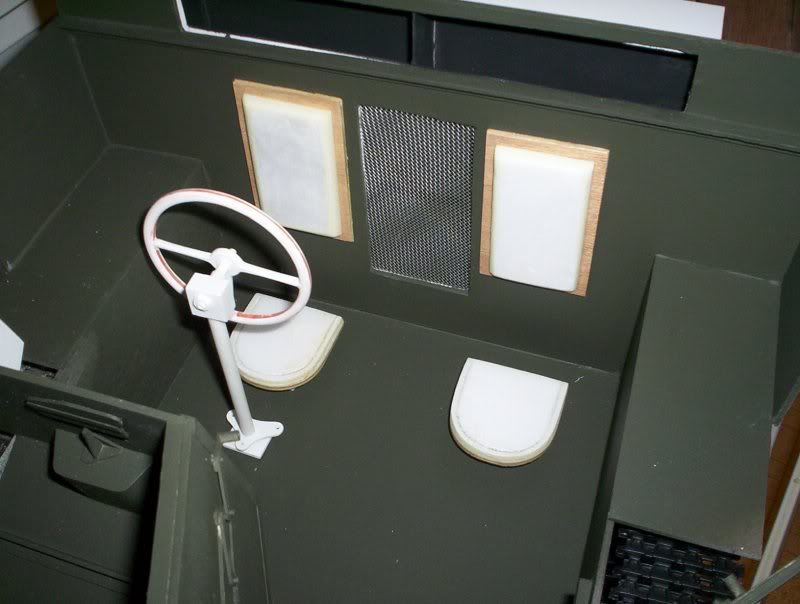
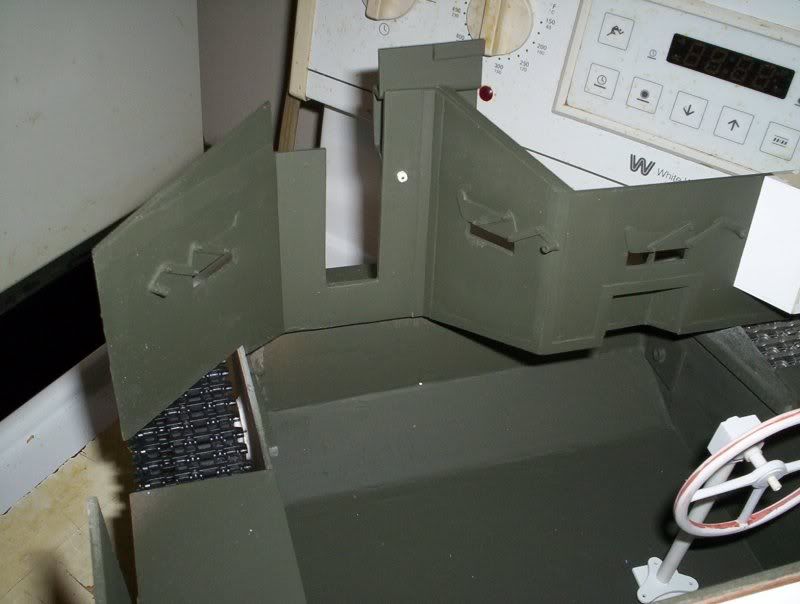
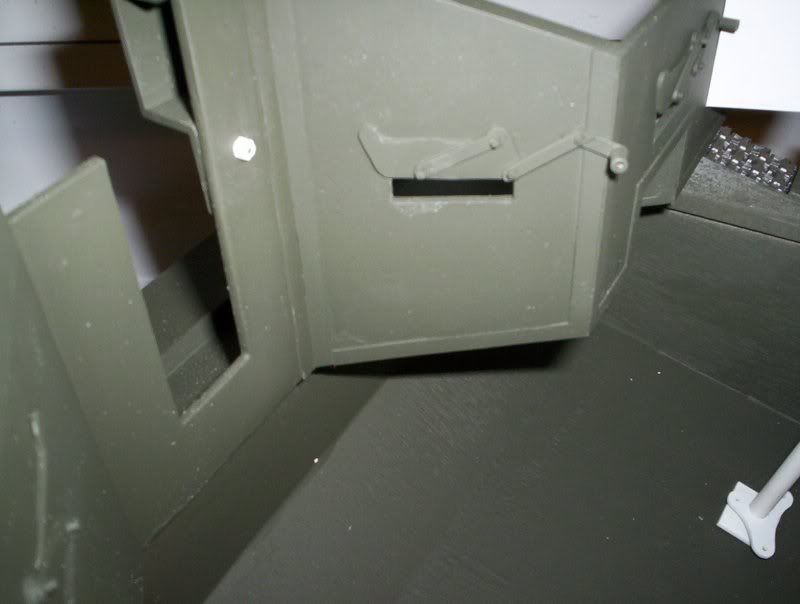
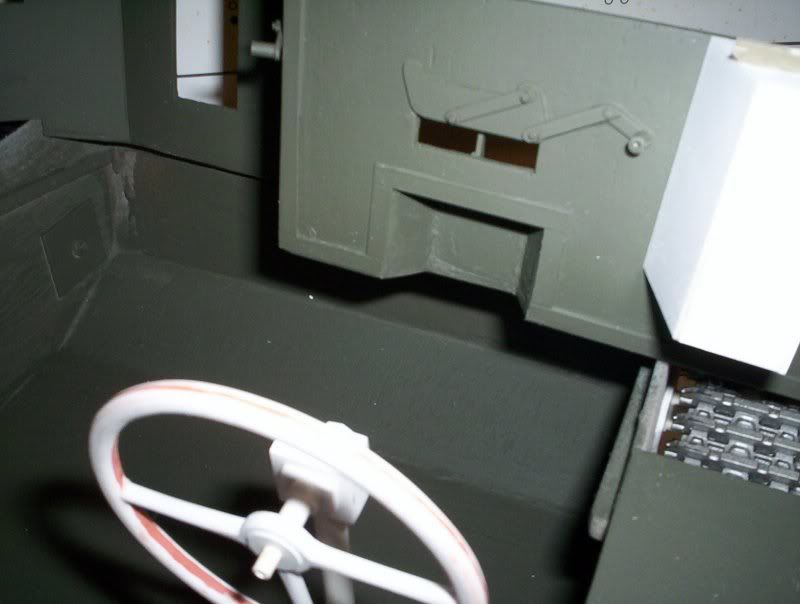
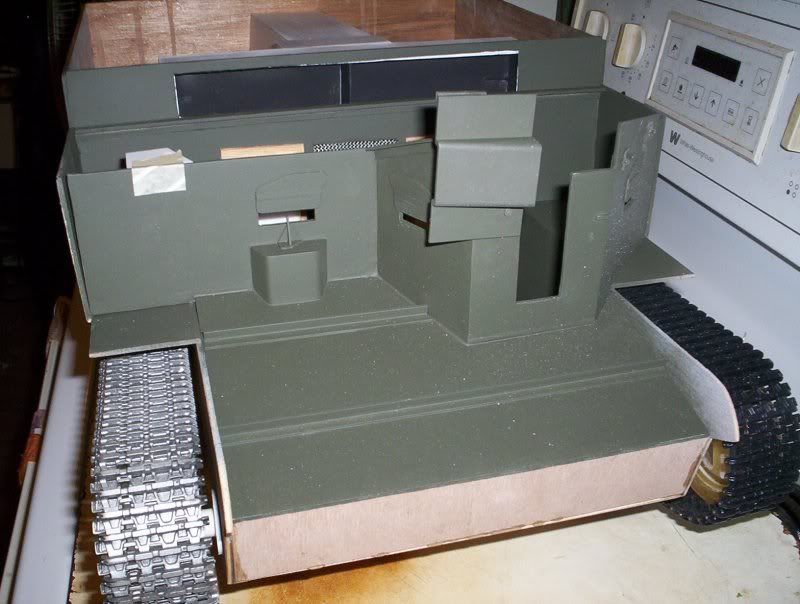
Well work is progressing on the carrier. I have opened up the upper vent and the radiator openings in the bulkhead. I used a piece of aluminum screening as a mock rad grill. I have added vision ports and guards with actuateing levers, constructed the steering wheel and mast, temporarily attached the seats, added dummy hinges to the ports side upper shield, made the front upper shield moveable, started the instrument cluster compartment. Here are pics of the work so far... there are lots of them
Re: My Scratchbuilt MkII Carrier a WIP
Thank you all for the kind words of encouragement.... Harold
If anyone has an old T2000 esc they don't want and would like to donate it to this carrier project I'd really appreciate it. I have heard that it isn't a very good one but might work fine for this project as all I want to control are the two motors, I thank you in advance
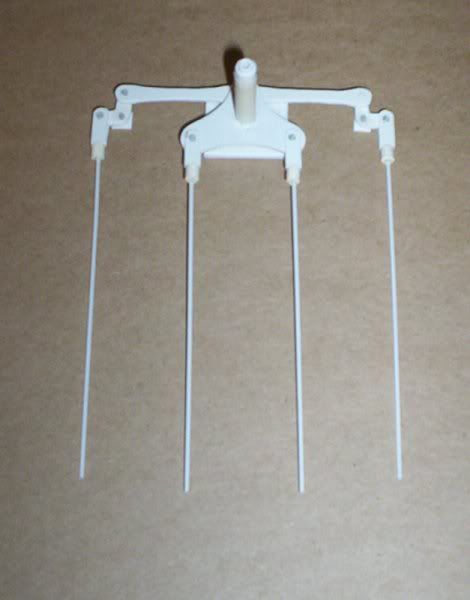
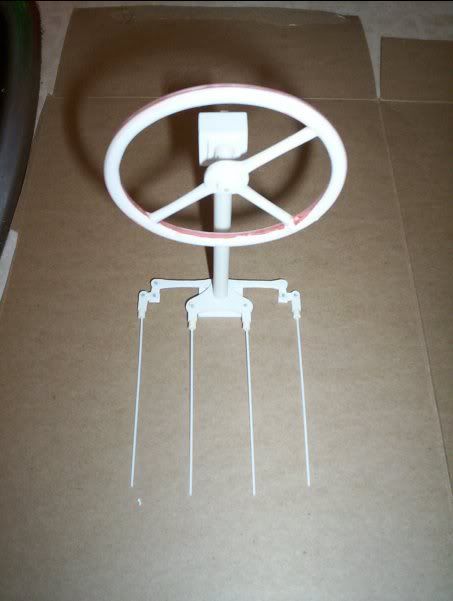
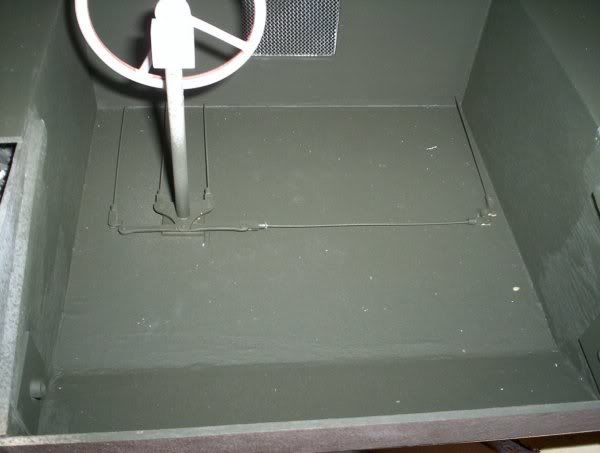
Update:
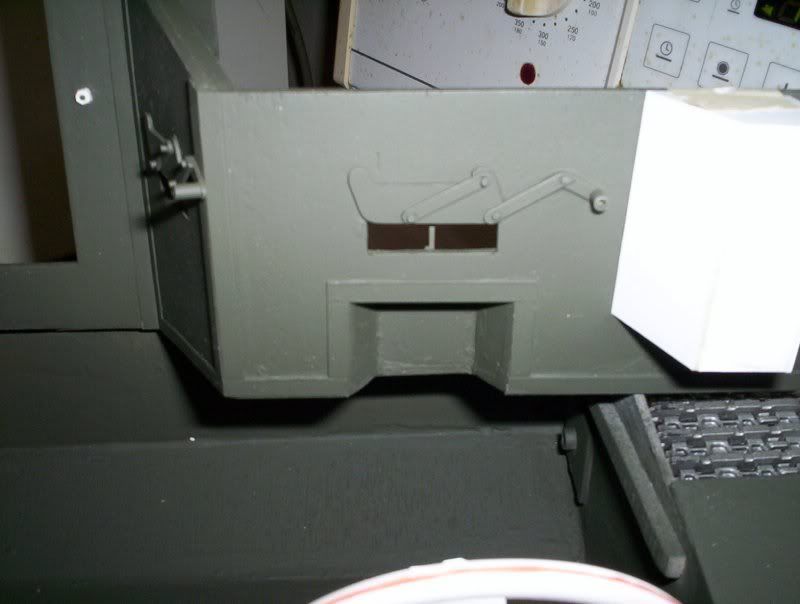
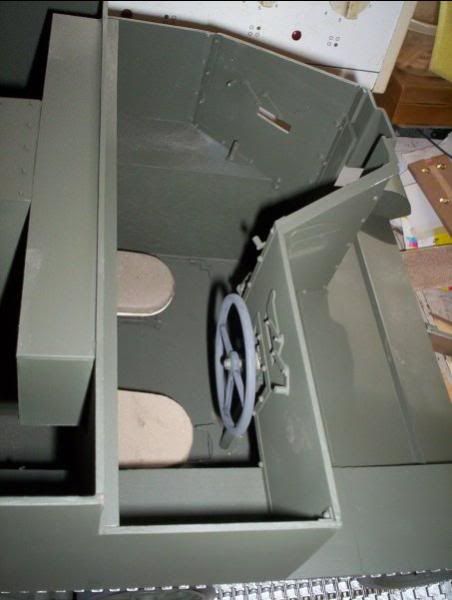
Carrier steering mechanism. Here are a few pics of my carriers steering mechanism prior to painting.

If anyone has an old T2000 esc they don't want and would like to donate it to this carrier project I'd really appreciate it. I have heard that it isn't a very good one but might work fine for this project as all I want to control are the two motors, I thank you in advance
Update:
Carrier steering mechanism. Here are a few pics of my carriers steering mechanism prior to painting.
Re: My Scratchbuilt MkII Carrier a WIP
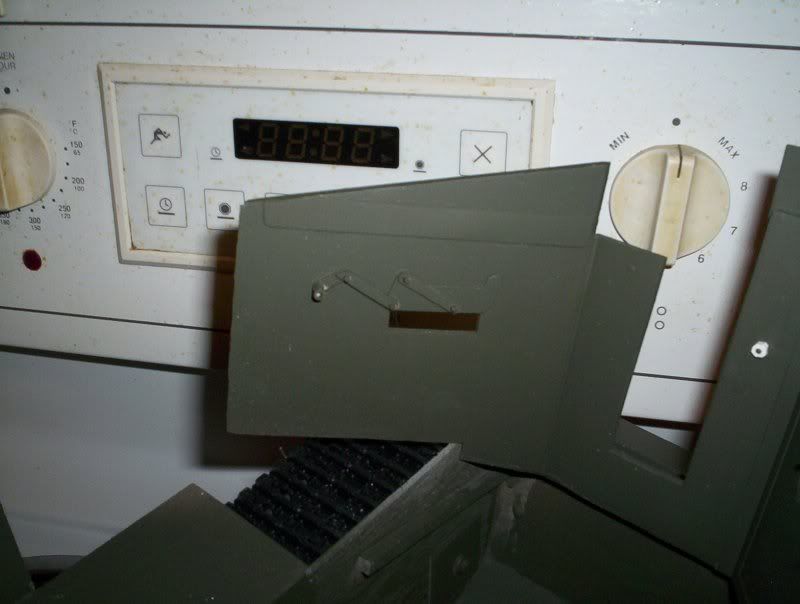
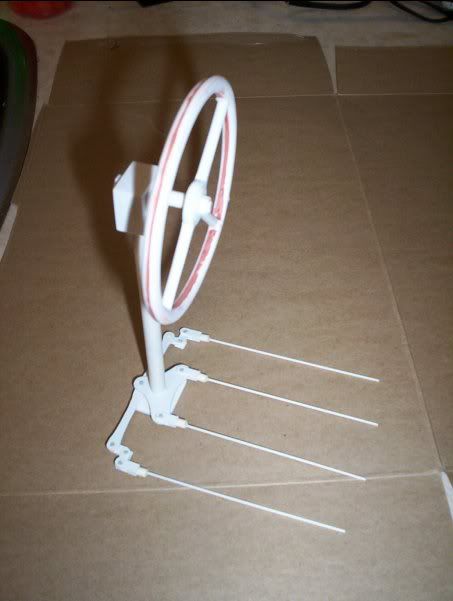
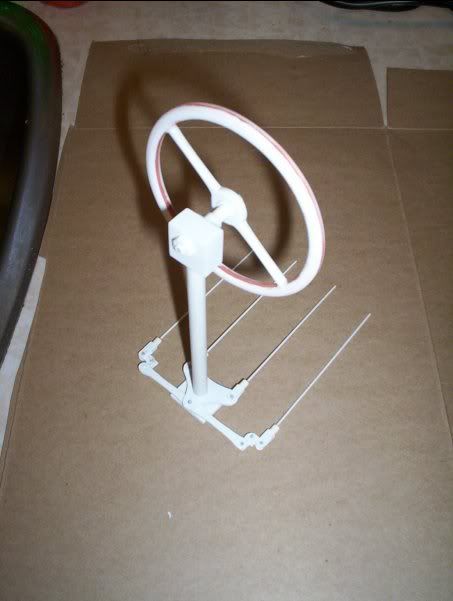
Thanks to a chap on the MLU forum reguarding an error in my linkage. Here are a couple pics of the corrected linkage. I had to run a rod from the steering mechanism over to the port side and run that linkage there.
Re: My Scratchbuilt MkII Carrier a WIP
Update:
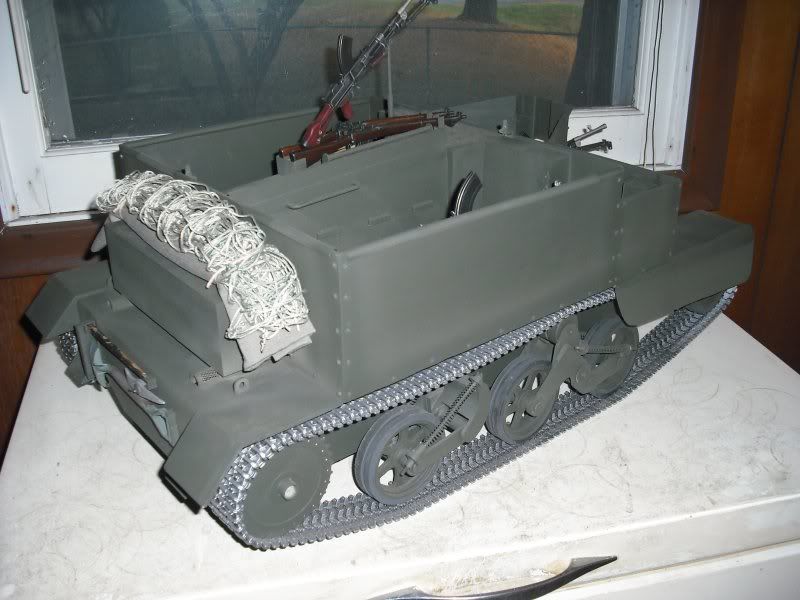
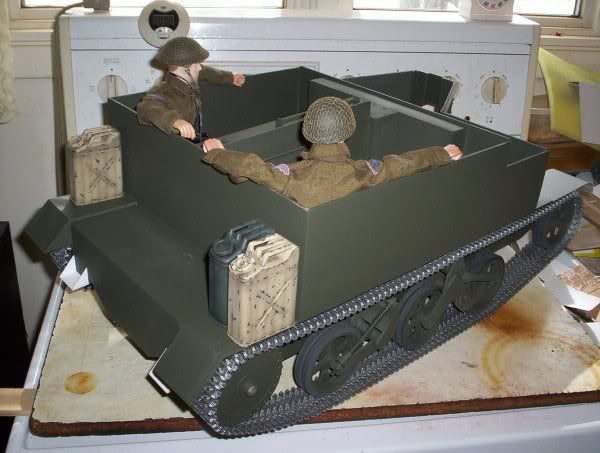
Well work still continues on the carrier. In these next pics I have added rivits to the outside and inside of the front shield and installed the seat frames. They can be possitioned in either the up position or the lowered position. I put a couple figures in the carrier just to see how it looks with the seats in the upper position. The rivits are all indivudually made by rounding off the end of a section of plastic sprue then cutting the rounded portion off forming the head of the rivit. Took a few hours to make the 180 rivit heads I have made so far although not all have been used as of yet.
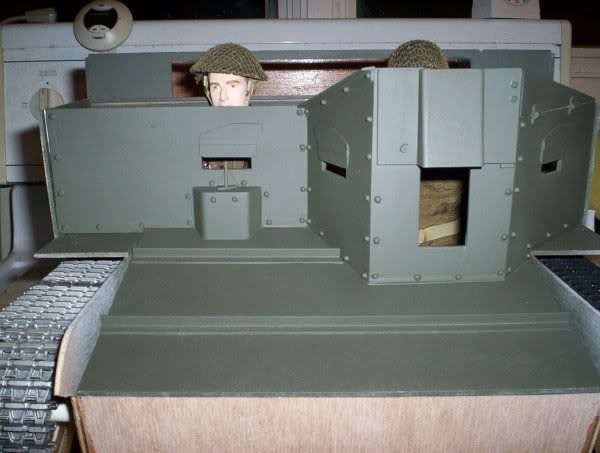
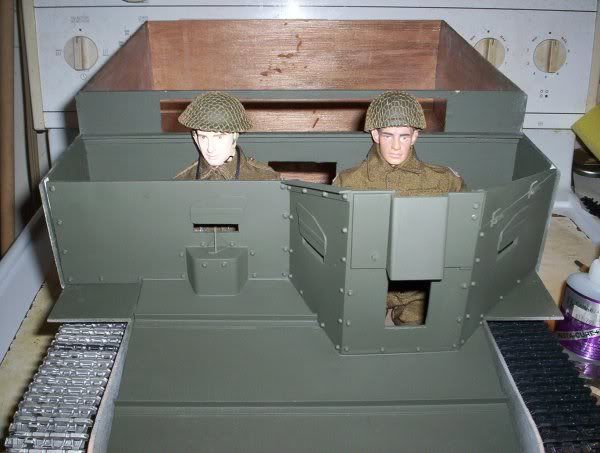
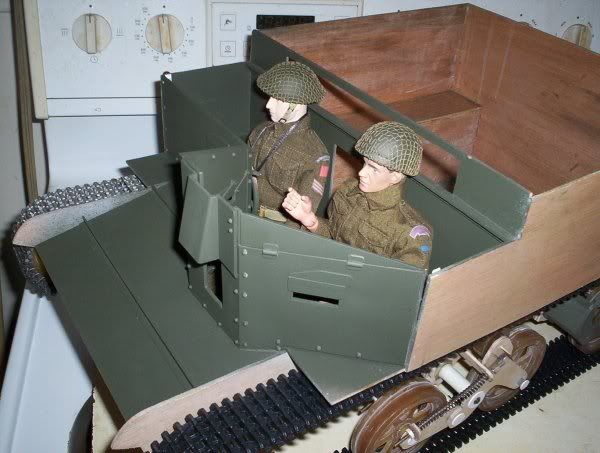
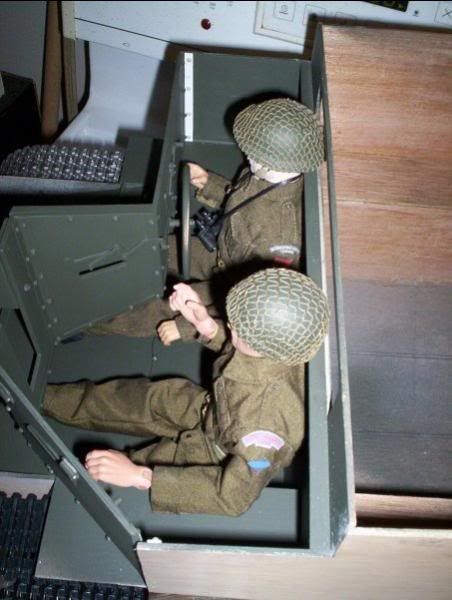
Well work still continues on the carrier. In these next pics I have added rivits to the outside and inside of the front shield and installed the seat frames. They can be possitioned in either the up position or the lowered position. I put a couple figures in the carrier just to see how it looks with the seats in the upper position. The rivits are all indivudually made by rounding off the end of a section of plastic sprue then cutting the rounded portion off forming the head of the rivit. Took a few hours to make the 180 rivit heads I have made so far although not all have been used as of yet.
Re: My Scratchbuilt MkII Carrier a WIP
Update:
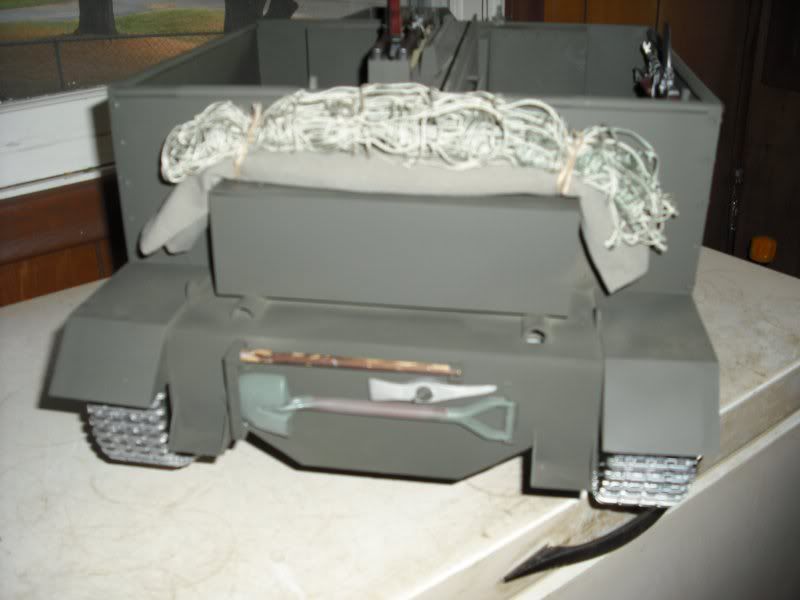
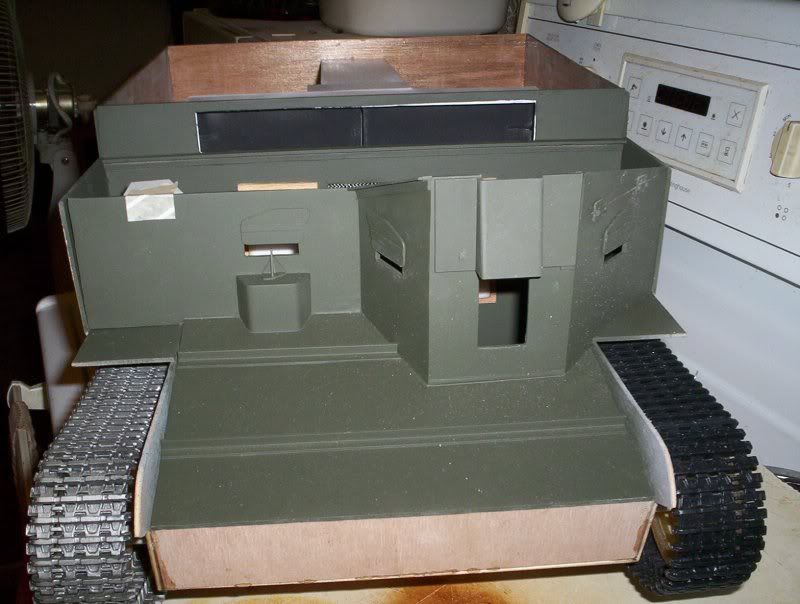
The work continues and getting closer to completeing this carrier. Here are the latest pics as she stands right now. I've added the front fenders and the steps on the rear plate. I've added details to the engine compartment cover, and given it another coat of paint. I've painted the track a metalic grey and will be giving the track some washes.
The work continues and getting closer to completeing this carrier. Here are the latest pics as she stands right now. I've added the front fenders and the steps on the rear plate. I've added details to the engine compartment cover, and given it another coat of paint. I've painted the track a metalic grey and will be giving the track some washes.
Re: My Scratchbuilt MkII Carrier a WIP
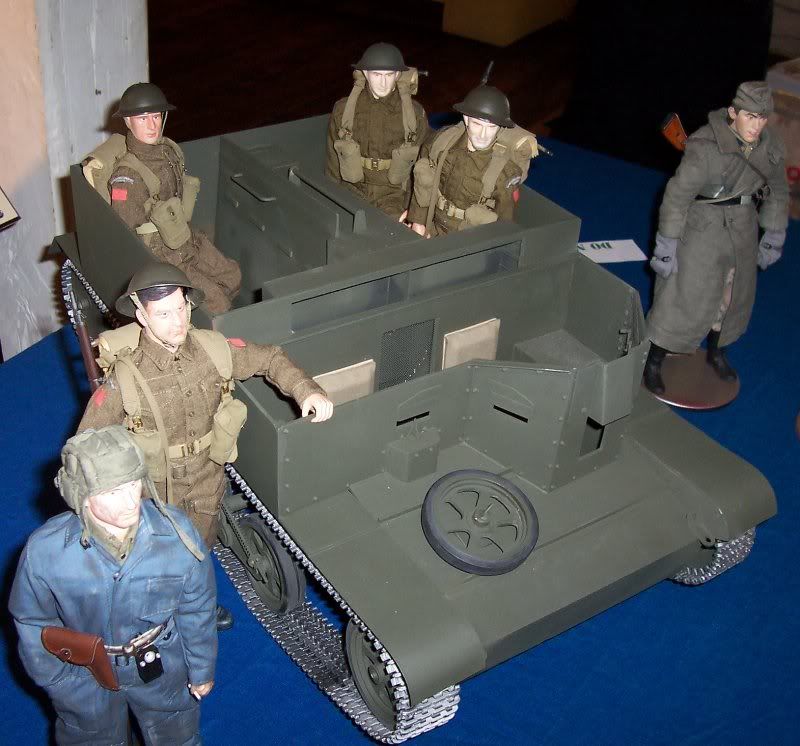
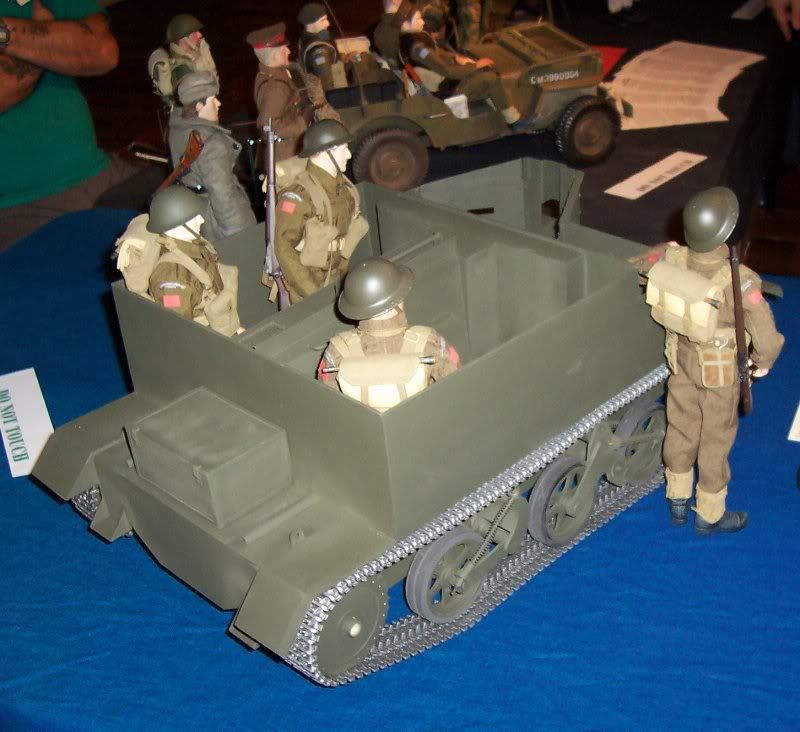
Here are a couple pics of the carrier as it was at the Toronto show this past weekend June13/09. Still not complete but it is slowly getting there
-
Brigardefuhrer

- Posts: 1020
- Joined: Sat Aug 02, 2008 11:26 pm
- Location: Chatham,kent
Re: My Scratchbuilt MkII Carrier a WIP
'She's looks good Harold,did you win any prize's?
"I require able bodied men,with good horse and gun.
I wish none but those who desire to be actively engaged".
"Come on boys,if you want a heap of fun and to kill some yankees".
Nathan Bedford Forest.
I wish none but those who desire to be actively engaged".
"Come on boys,if you want a heap of fun and to kill some yankees".
Nathan Bedford Forest.
Re: My Scratchbuilt MkII Carrier a WIP
The reason I didn't enter it was because it wasn't finished
Turns out my carrier is a MkI carrier but I'm doing the facelift to it. A picture of the MkI before and after the facelift is in the carrier book and a chap from the MLU forum said since I was well along on the MkI carrier I should do the facelift version here are pics of the start of the facelift
MkI modification
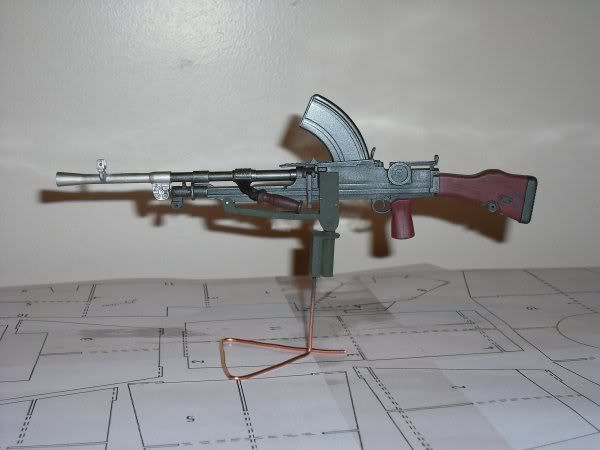
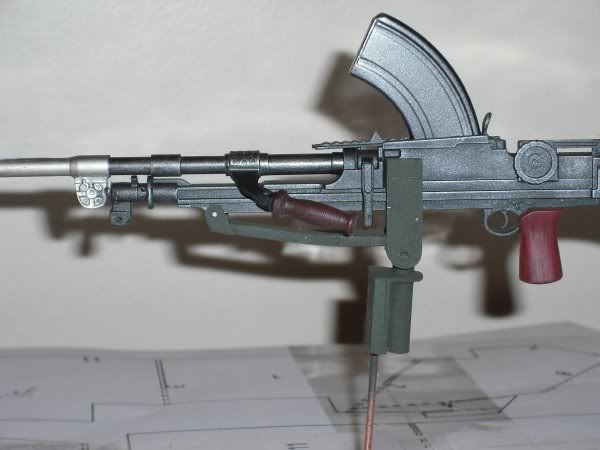
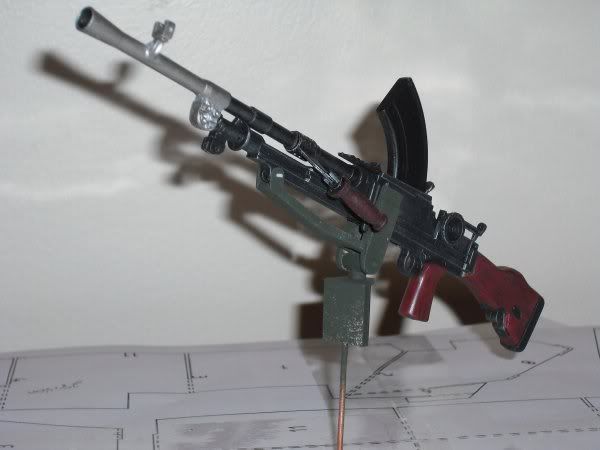
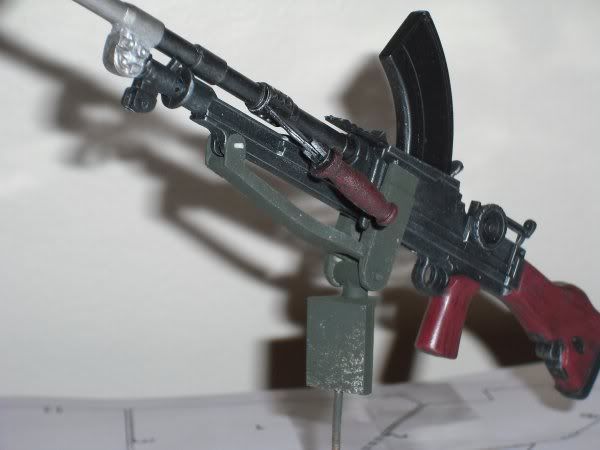
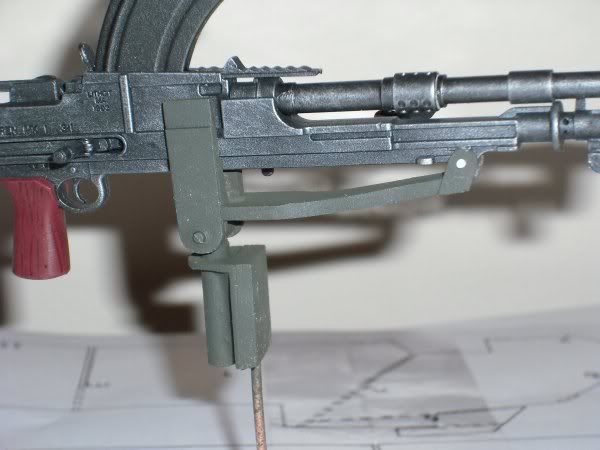
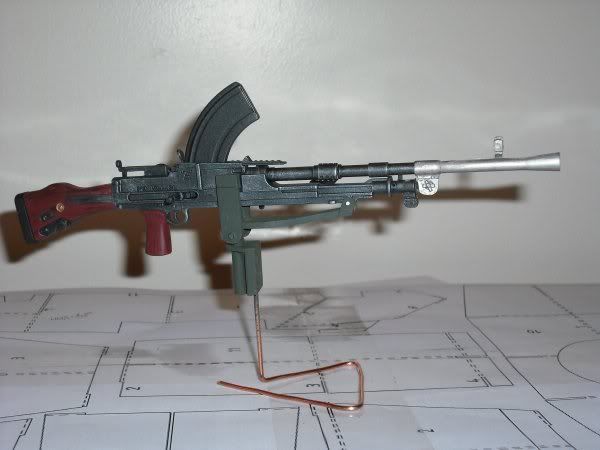
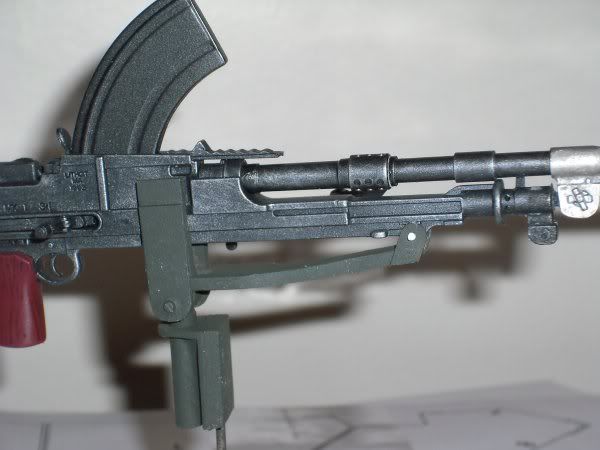
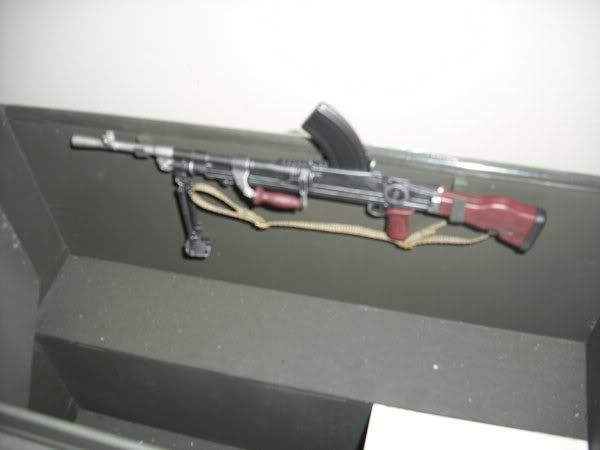
I have started the brengun mount for the gunner and here are pics of it. I have temporarily removed the bi-pod and sling
Turns out my carrier is a MkI carrier but I'm doing the facelift to it. A picture of the MkI before and after the facelift is in the carrier book and a chap from the MLU forum said since I was well along on the MkI carrier I should do the facelift version here are pics of the start of the facelift
MkI modification
I have started the brengun mount for the gunner and here are pics of it. I have temporarily removed the bi-pod and sling
Re: My Scratchbuilt MkII Carrier a WIP
Update:
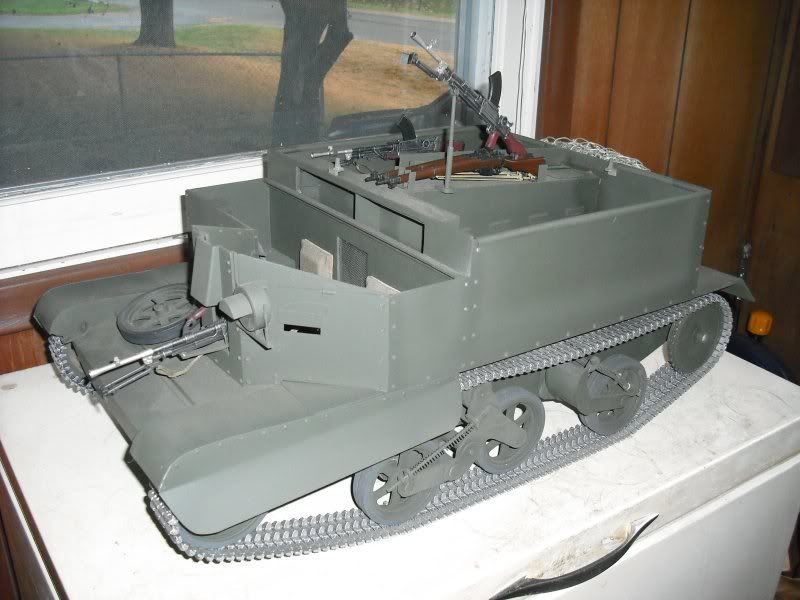
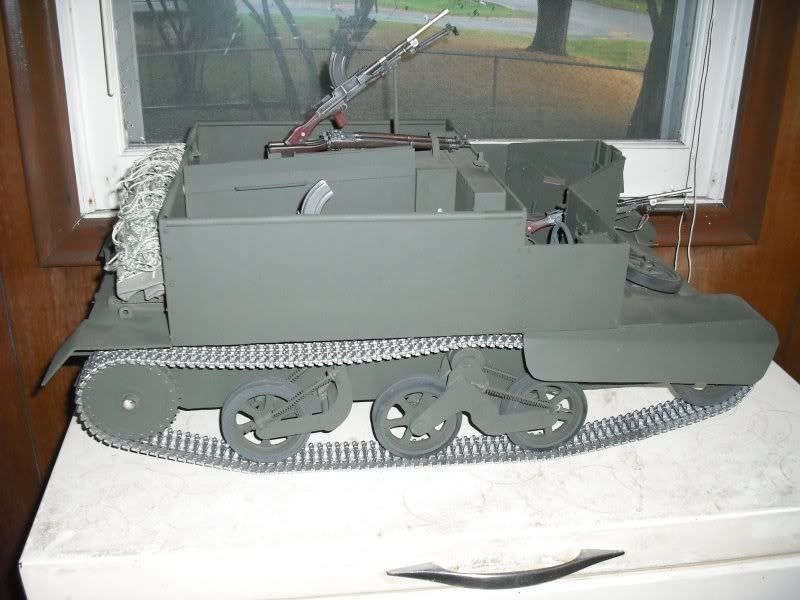
I finally got some more work done on my carrier. With all the other projects I have on the go I kind of fell behind on this carrier. Here I have installed the forward bren and mount, added the dash, added the rear stowage bin, added the dual rifle rack, added the anit-aircraft bren mount and gun, added the spare bren and mount to the side wall of the carrier, and finally started on the 2 rear fuel tanks. Here are the pics
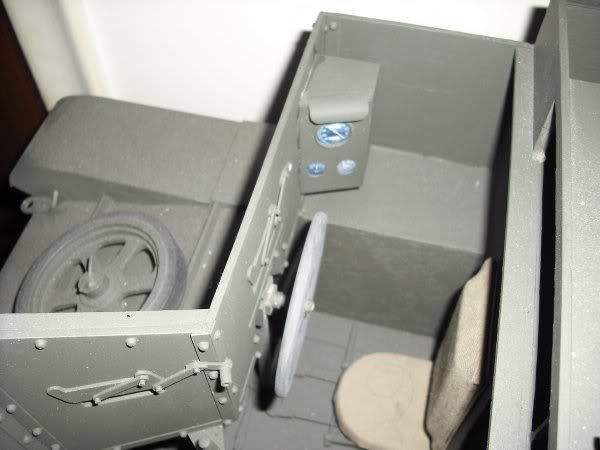
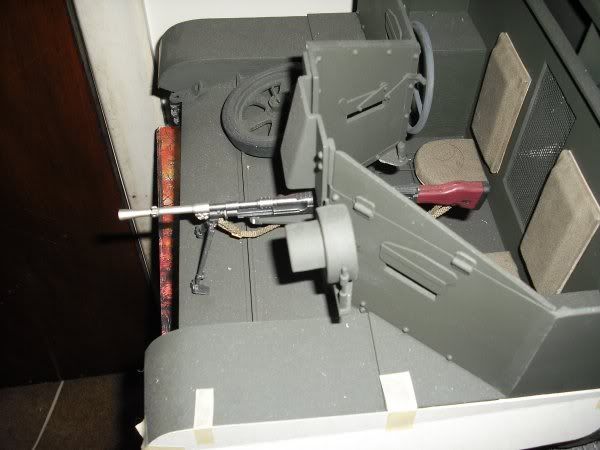
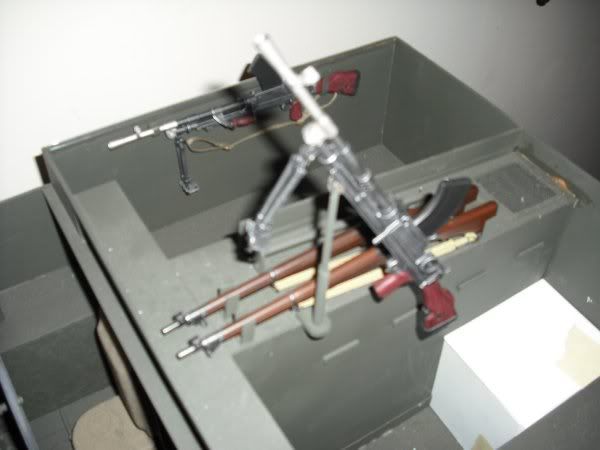

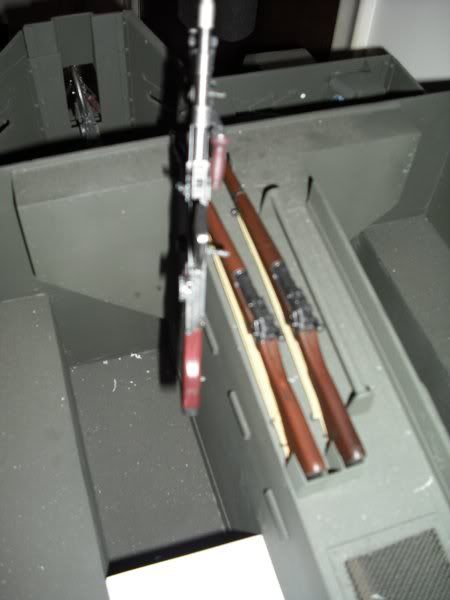
I finally got some more work done on my carrier. With all the other projects I have on the go I kind of fell behind on this carrier. Here I have installed the forward bren and mount, added the dash, added the rear stowage bin, added the dual rifle rack, added the anit-aircraft bren mount and gun, added the spare bren and mount to the side wall of the carrier, and finally started on the 2 rear fuel tanks. Here are the pics
Re: My Scratchbuilt MkII Carrier a WIP
Well the carrier is finished and ready for Jack to pick it up. He will add the unit markings and crew the carrier. Here it is with the side skirts added, the rest of the rivits added, and paint touched up.